Check storage first
The top storage bar includes used and reserved space. New uploads need enough free capacity. Manage subscriptions inside the mobile app.
Use your phone to set up your account and approve your Mac. Use the Mac app to organize, upload and deliver your photos and videos.
Screenshots show the real app with demo accounts and example images. Your photos, names and available options may differ by app version. Tap a screenshot to enlarge it.
Keep the mobile app signed in while you connect your Mac.
Download Movon World on iPhone, iPad or Android. Sign in with Google, or Apple where available. For a new account, choose Photo & Video Professional when the app asks for your profile type.
Photography and videography use the same professional profile. Use the same account on the phone that will approve your Mac connection.
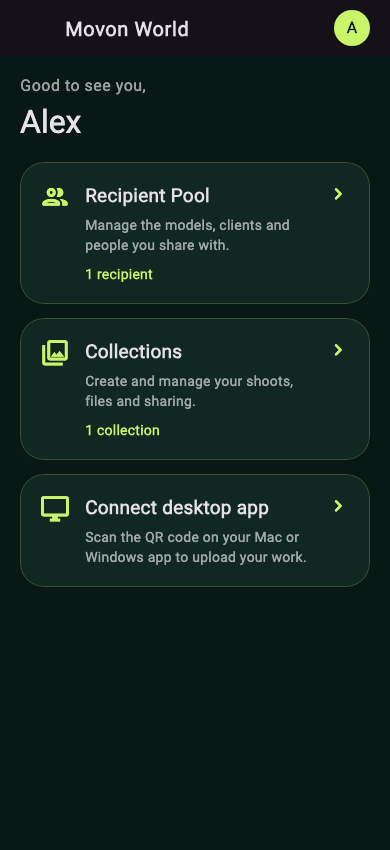
Your home screen has three direct cards: Recipient Pool to manage the people you share with, Collections to create and manage shoots, and Connect desktop app to connect your Mac for uploads. Storage usage and Upgrade your storage plan are in your profile menu.
New professional accounts receive 2 GB free for 30 days without payment details, followed by a permanent 250 MB free plan. Existing trials retain their promised allowance until expiry. If usage exceeds 250 MB after the trial, uploads pause and you have a 30-day grace period to free space or upgrade; your work is not automatically deleted. Use Upgrade your storage plan for 15 GB total storage, 50 GB total storage, 100 GB total storage, 500 GB total storage or 1 TB total storage. Your new plan replaces your current storage allowance. Storage allowances are not added together. Your existing files count toward the new total. Choose a monthly plan inside the mobile app and review the store’s price and renewal details before confirming.
 Enlarge screenshot ↗
Allow notifications if you want app updates. You can change this later in your profile menu and your phone’s notification settings.
On the home screen, tap Connect desktop app. Allow camera access, then scan the fresh QR code displayed by the Mac app. If the QR code has expired, refresh it on the Mac and scan again.
Approving the QR code signs the Mac into the same account. Wait for the connecting indicator to finish.
Open the Movon World Mac app, then approve its QR code from your phone as described above.
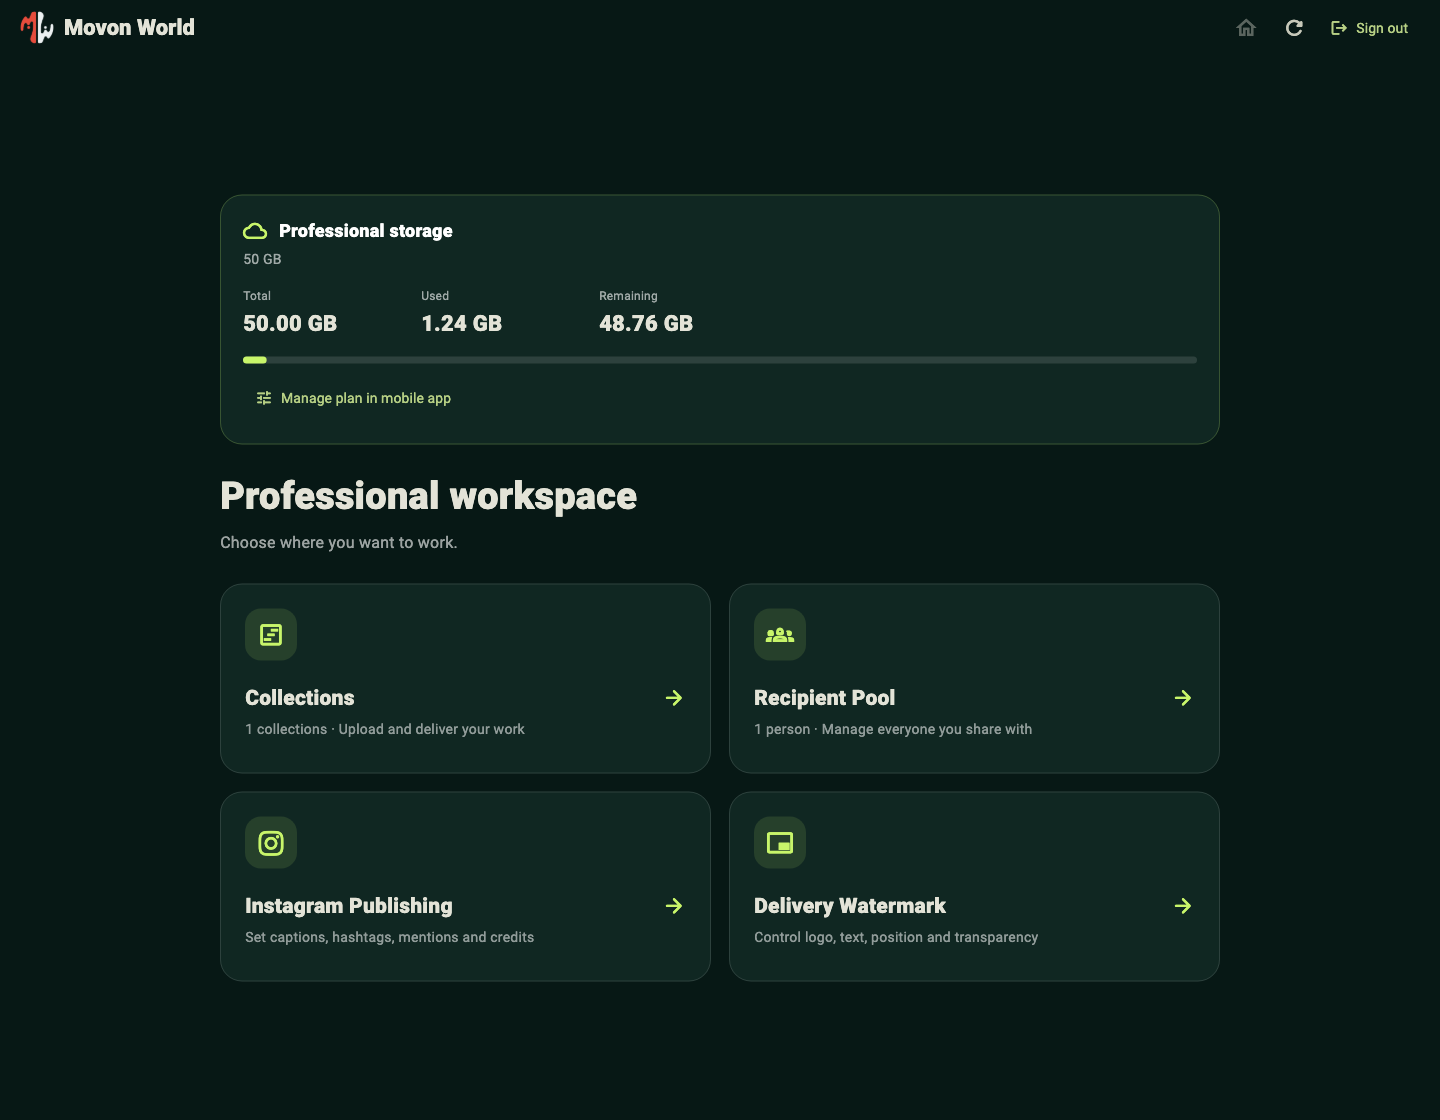
The landing page shows your storage use and four tools: Collections, Recipient Pool, Instagram Publishing and Delivery Watermark.
Select your profile picture beside your account name to open Edit profile. You can change your display name and profile photo, then select Save changes. Your edited name is used on your profile and new collections. An administrator-assigned name keeps priority. The Recipient Pool supports name search, blocking and unblocking. Blocking stops new sharing and related notifications in both directions while preserving your own files. Use Blocked by me to review your blocks. Start in Collections. Use the Home icon at the top whenever you want to return to this landing page.
 Enlarge screenshot ↗
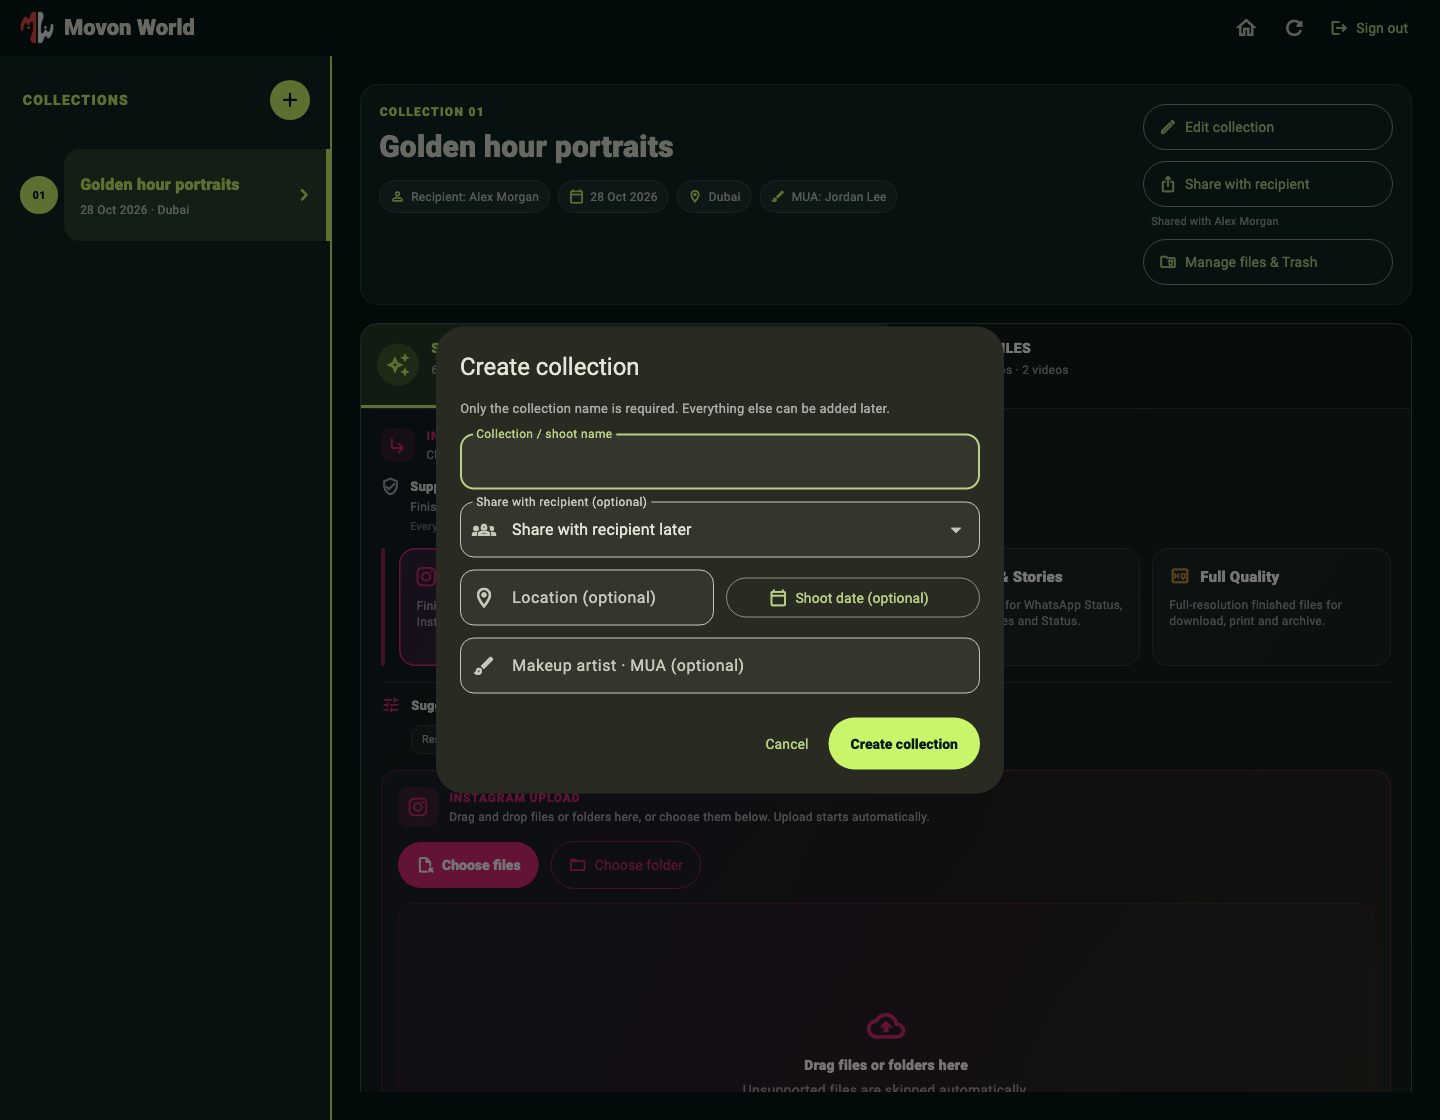
Click the + beside Collections. Give the shoot a clear name. Location, date and makeup artist are optional. You can choose a recipient now or share the collection later.
A separate collection for each shoot helps the same recipient recognize different sessions.
 Enlarge screenshot ↗
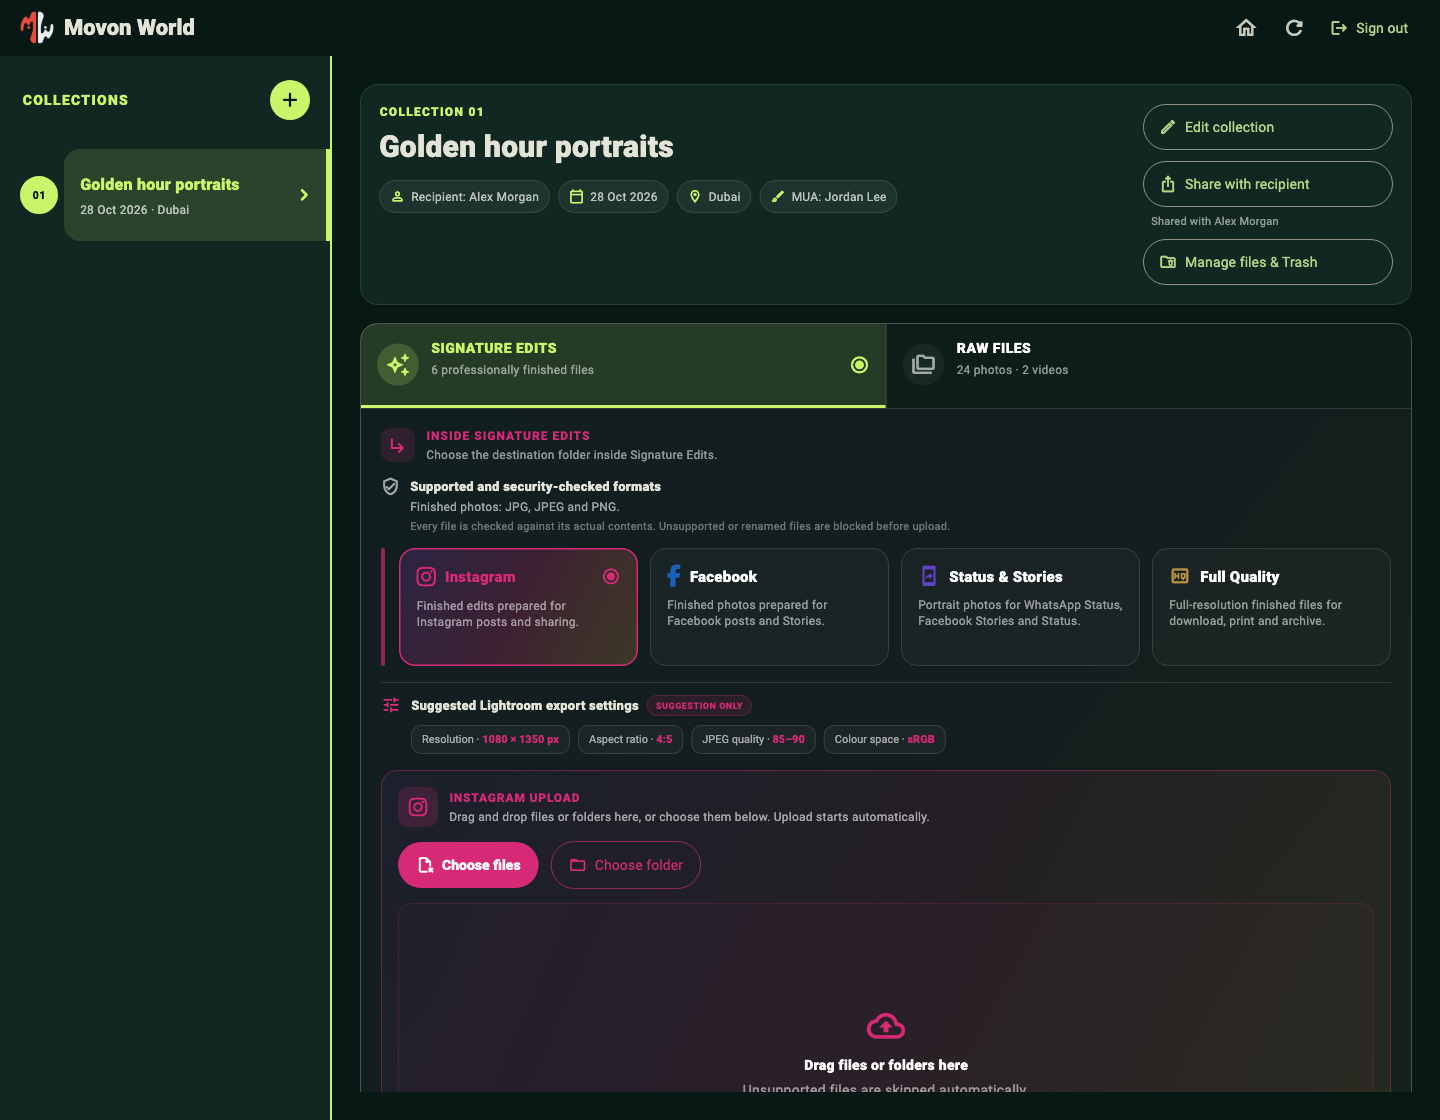
Open the collection. Choose Signature Edits for finished images, then select Facebook, Status & Stories, Instagram or Full Quality. Choose RAW Files for original photos or videos, and then the matching photo/video section.
Drag files or a folder into the upload area, or use Choose files / Choose folder. Upload starts automatically. Keep the app open and wait for the batch to finish.
The app lists the supported formats for the selected destination. Unsupported files are skipped with an alert; changing a file’s extension does not make it supported.
 Enlarge screenshot ↗
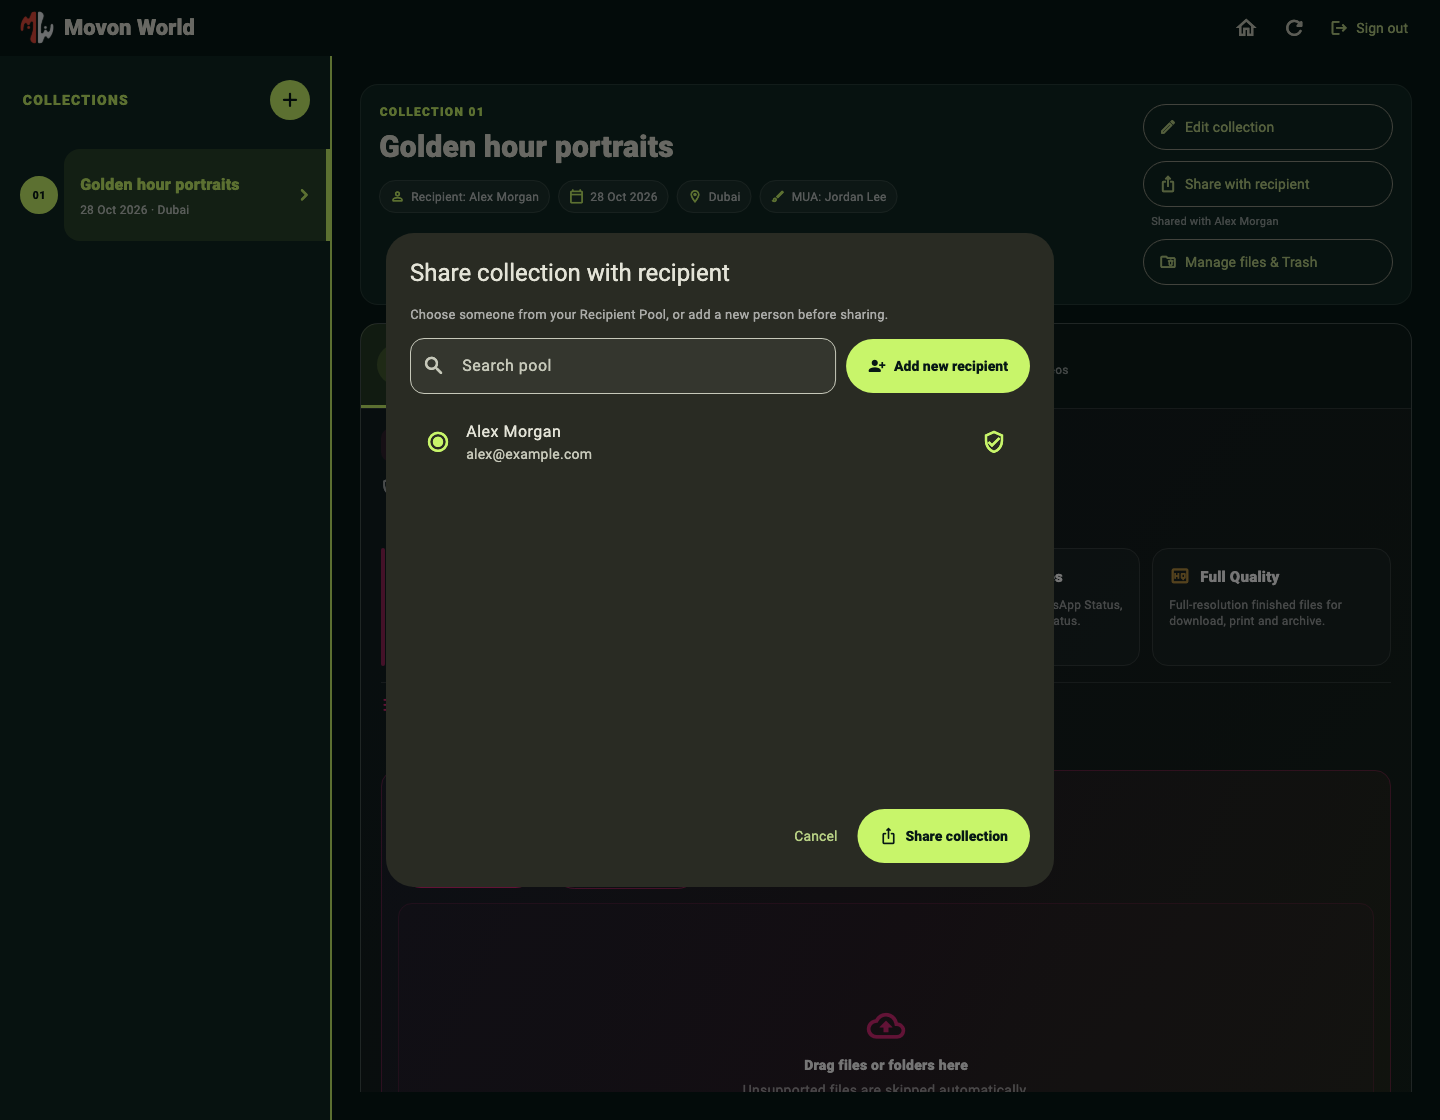
Use Share with recipient inside the collection. Search your existing pool, or choose Add new recipient and enter their name and correct email address. Newly added people are saved in your Recipient Pool.
Confirm Share collection. The recipient receives an email; registered users with notifications enabled can also receive a mobile alert. If uploads are still in progress, the ready notification waits until the batch finishes.
The invitation email includes the mobile download link. The recipient should sign in with the invited email and follow the invitation steps.
 Enlarge screenshot ↗
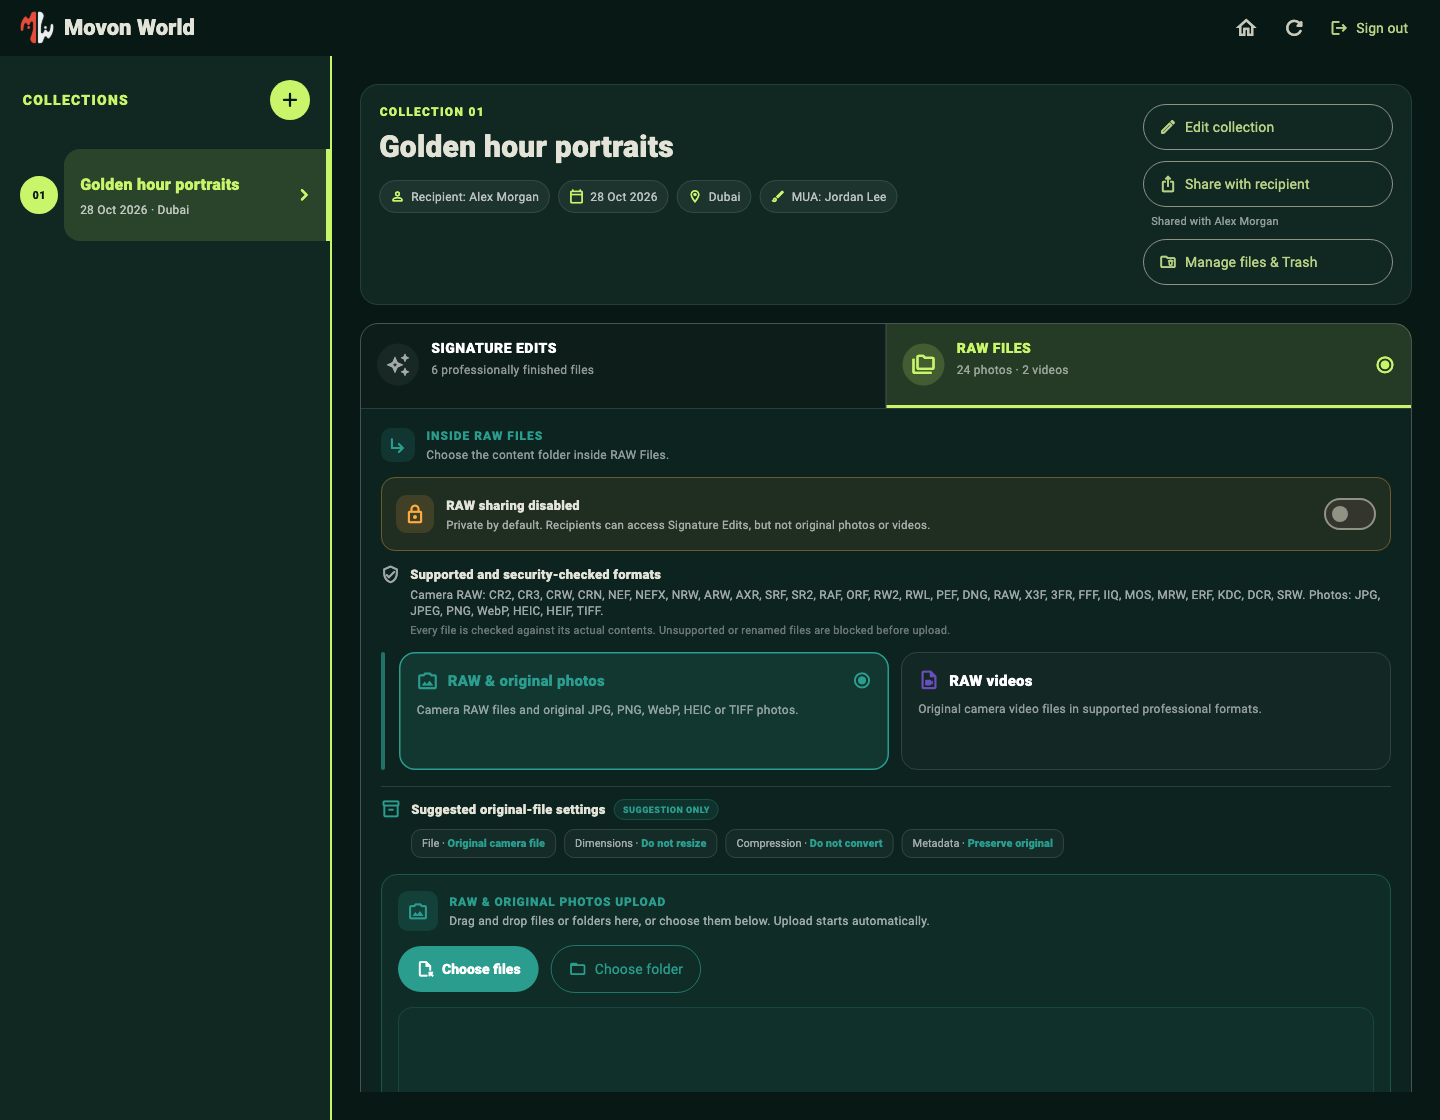
RAW sharing is off by default. In RAW Files, enable it only when you intend to give the recipient access to originals. Review both confirmations and the watermark choice before proceeding.
A watermark on an exported photo does not prevent someone from copying or editing an original RAW file. Share original files only with people you trust.
 Enlarge screenshot ↗
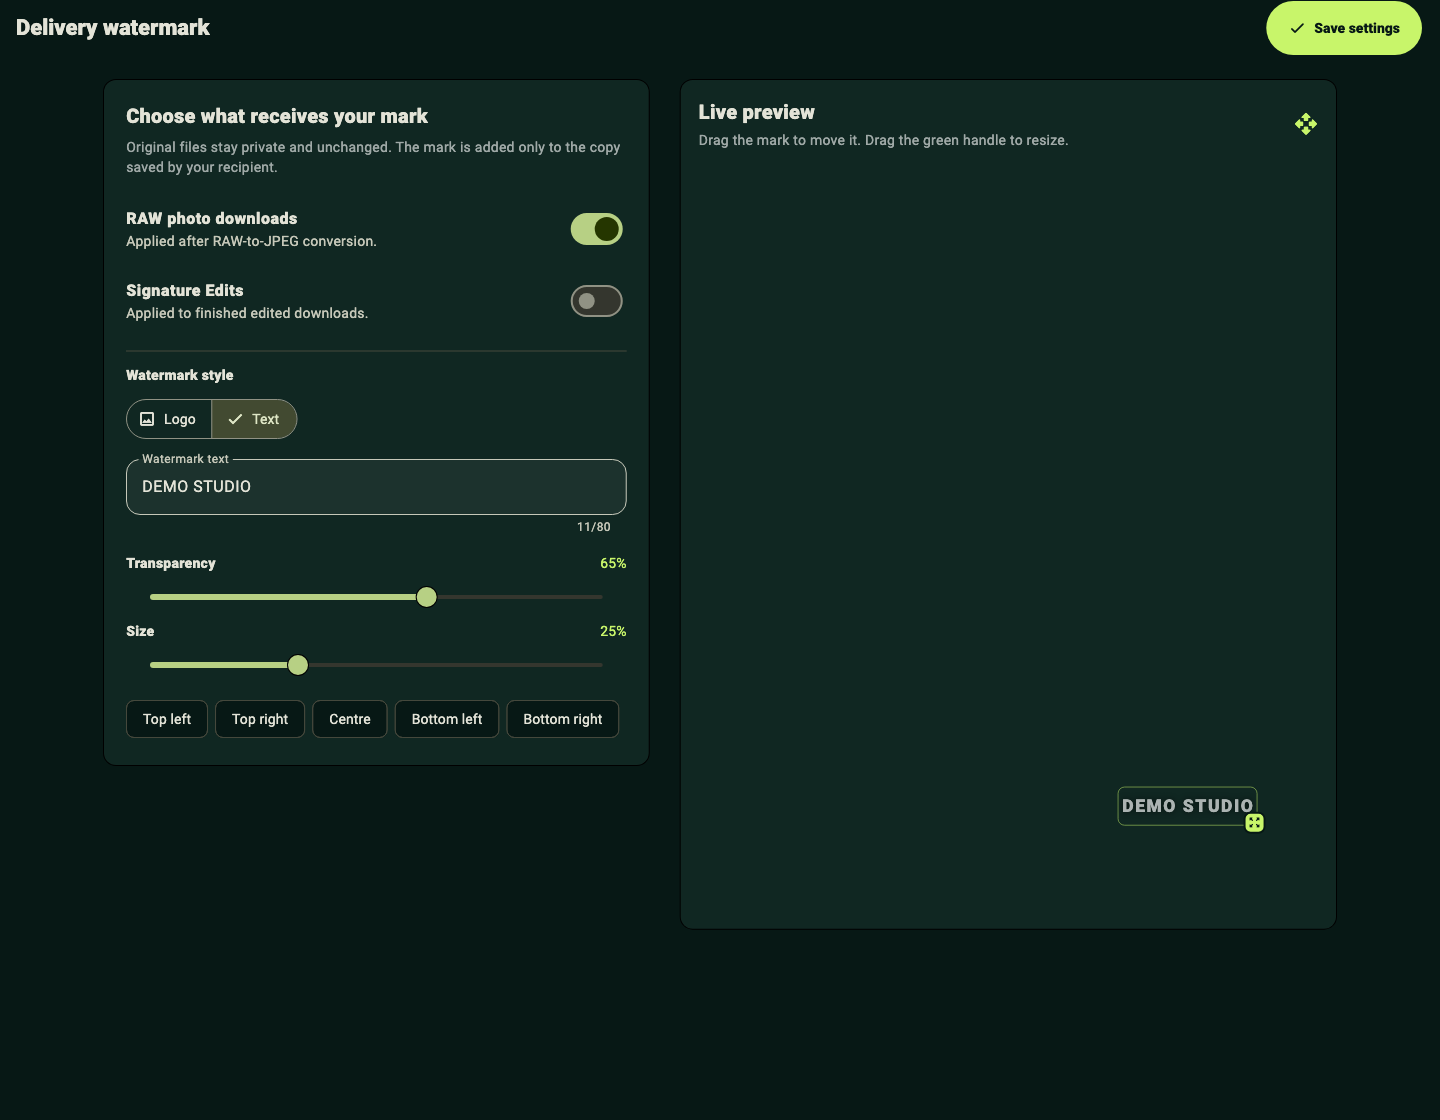
Return Home and open Delivery Watermark. Choose a logo or text. Select whether it applies to RAW-derived photos, Signature Edits, or both.
Use the preview to position and size the mark, adjust transparency, then save. Instagram Publishing lets you prepare captions, hashtags, mentions and credits for supported mobile shares.
 Enlarge screenshot ↗
The top storage bar includes used and reserved space. New uploads need enough free capacity. Manage subscriptions inside the mobile app.
Manage files & Trash lets you recover trashed files for 30 days. Trash still uses storage. Permanent deletion frees capacity after the cloud deletion succeeds.
Download the Mac app, open the ZIP and move Movon World to Applications. The same page includes the mobile apps. Windows is coming soon.